I suppose it'd be rude of me to abandon this place without at least giving you guys a good once-over of the one massive achievement I managed to accomplish, this year. This'll likely be a long one, at least photo-wise, but it's something I had intended months ago when I built the damned thing...
Just a heads up, this won't be a review, necessarily, but just more of a photo-journal of the build, including some notes (for what I can remember) of the process.
I got the HGUC Neo Zeong a little earlier than intended with some money obtained from the holiday season. Tax season was the intended goal to get this, but... Well, let's just say it was a good thing I got it when I did and leave it at that.
Yup, that's me. Ignore the serious look on my face, I was probably more focused on making sure the camera got the whole field of vision. I swear to you, I was happier than this made me look. lol
A layout of all the runners, still bagged. Definitely a room-filler! I took this before the project would be shelved so I could complete the kits prior to this one's beginning.
Once I got around to this thing, even though I was aware of the scale of the task, I still seemed to be unaware of just how much time the process would take! This, I believe was the first day of work...
I just wanted to see how the 1/48 Snanju Head Display Base would fit. It's strangely proportionate. lol
The next bit would be the first wave of paint work. I believe this was almost 2 more days, right here.
I started taking a little more "teaser" shots around this point, making
it feel more ominous, and showing more details and what I felt were
interesting angles. I think I intended on posting a few of these a week, but for whatever reason, the plan fell away from me...
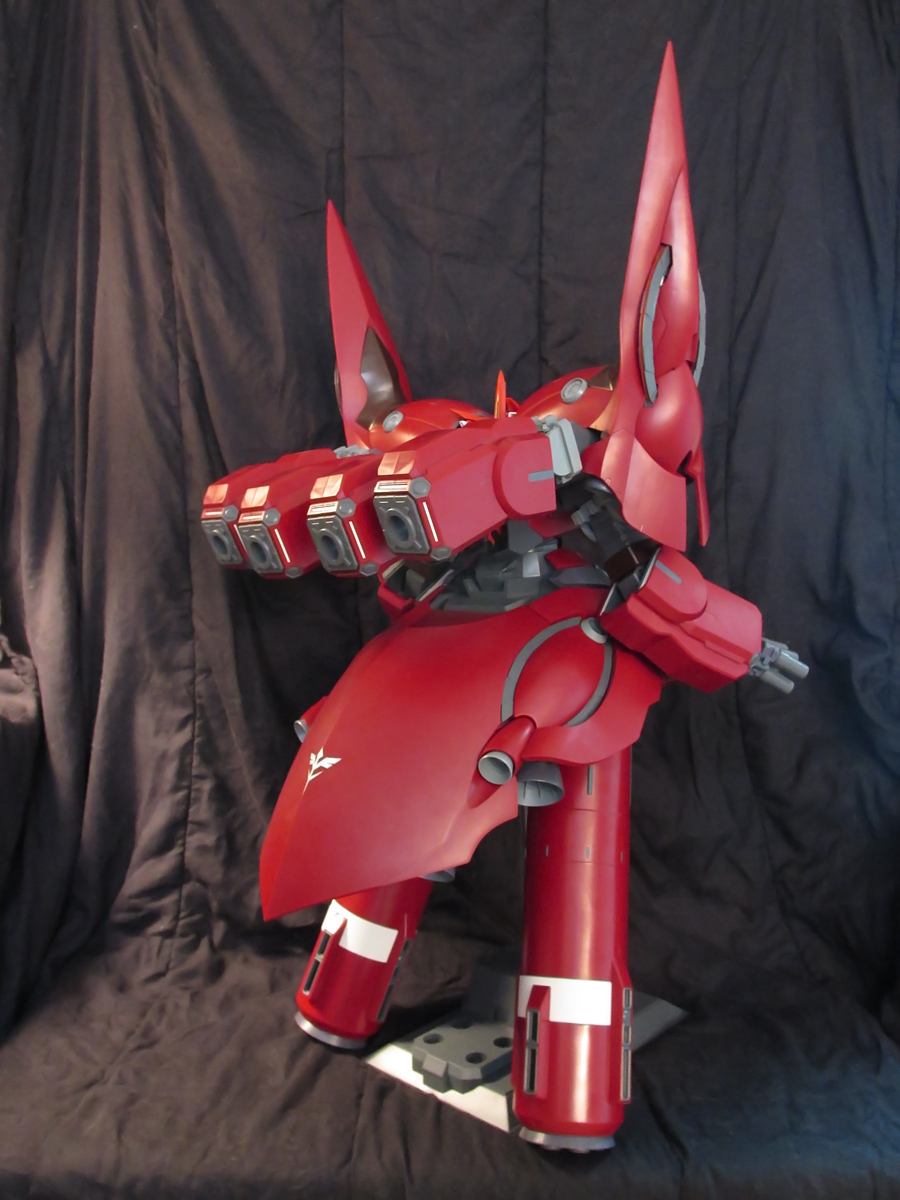
Here, you can see how I painted the interior of the Psycho Shard emitters. I feel the color works really well while still remaining simple enough to not be distracting.
The next day would see the completion of the skirt, save for 2 pieces that the booklet recommended not attaching until the strum boosters are added. As you can see, the Sinanju Head can no longer fit in the space I had it. lol
The teaser shots for the skirt parts and main body. You can see the line work inside the I-field generators, which I gave a faint green lining to make them look active but not deploying. It's fairly unnoticeable against the full kit, but when up close, it's a nice touch, I think!
Dat... Neo Zeon crest. XD
Now we can scale its main body with an actual suit. What better than that who will wreck the thing, the Unicorn Gundam.
And another shot of me, holding this thing for the last time in a way that would be at all photogenic.
The underskirt details and large thrusters were next. All of the inner thrusters are that dark red, so it took some time to paint all 12 of those. Also, those little (in relative terms) "buttons" on the framework of the skirt were painted a more blue-grey, to match the in-show colors. Same went for the interior of all the large thrusters, which you should be able to notice in the first picture.
Also got some new shots of the inner shoulder bays and main dock. That camera (?) on the enclosement was done using silver with an orange clear coat. I felt red would have been too bland.
And then, to finally get the thing "standing," the large Strum Boosters were completed. Only one more, very repetitive step remains to complete the main mobile armor component......
Yup...
Those...
The arms, all 6 of them, didn't take quite as long as I was expecting, but part of that was that I prepped the paintwork when I was doing the thruster interiors, since the paint color was shared between, and it was a mixture, so I had to use it while I had it.
Not liking the all-aligned barrel look that the kit calls for with the funnel bits, I opted to perform a small "mod" that was simply not pushing the bits all the way on their posts, which allowed me to angle them just a little bit. This gave me the ability to pose them a little more like manipulators, which gives the machine a much more fearsome look.
And now, it stands... Or... hovers... I dunno, but it's there!
And now, it awaits its wielder...
I didn't take many pics of the WIP for the Sinanju's build, but It's nothing I haven't done before (mostly). Though I did take pics for when I was painting the crests and Sleeve ornaments. I did the same thing I did for the gold bits on the V2 Gundam, using an enamel copper base coat, and topping it off with a clear yellow overlay. then went back, lined it and filled in the black.
Finished pics of the Sinanju [Episode 6 Ver.], as I've come to dub it.
And this was how I displayed it for about a week, allowing the Sinanju to be properly admired before I decided to throne him into his chariot.
The NZ-999 Neo Zeong, now ready to deploy...
Some final closeups.
I enjoyed this build immensely. Though, in all honesty, it lacks a lot of the depth to the build that the HGUC Dendrobium had. Then again, that thing almost felt more like an MG than an HG in some parts.
Also, to me, this doesn't quite feel complete, as it's missing one major accessory that Bandai felt necessary to shove out separately as a
P-Bandai item... It's something I will either get with luck or accept as a forgotten gimmick.
Hope you all enjoyed this trip with me, and I apologize for getting it to you all so late.


No comments:
Post a Comment