Showing posts with label Last Shooting Project. Show all posts

2013/02/07

Last Shooting FINAL: LSP-001 Escape

In an uncharacteristic move, I decided to finally finish a long overdue project... Namely, my Last Shooting Project diorama, not touched since October. I guess I had my reasons, but honestly, I didn't realize just how close I was to done with it, apparently, as I did the rest of the mods and final assembly in one night!

Since it's no longer a W.I.P., I'm just gonna jump right into the final overview of this diorama!

Last Shooting Project
LSP-001 "Escape"

2012/10/28

Last Shooting WIP 3: A Baoa Qu base

Okay, the next part of this is not a kit, but the scratch build of the display base for the whole diorama.


I chose to make it roughly 10" x 10" x 10" to conserve space but still provide decent room for detail.
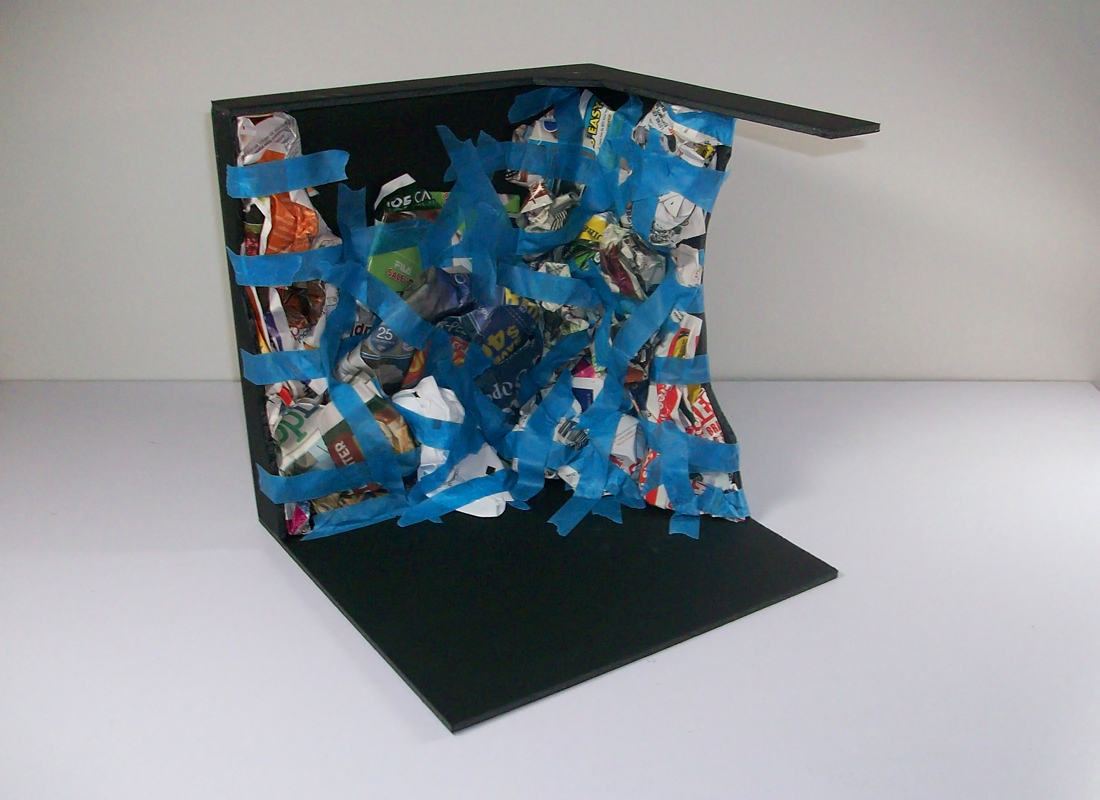
The frame is made up of 3/16" black foam core cut into panels. I used craft glue and painter's tape to stabilize it while the glue dried.


Testing to see if the size will be good. Orginally, I was going to have the back wall continue upward for the actual facility detail to show. But cut that out, as I didn't have the material to extend the back wall, plus the Zeong head coming up over the top will hopefully prove more dynamic.


The next step involved crumpling newspapers and ads to start the base for the rocky structure the Gundam will be standing in. This will be covered with plaster cloth to create the rocks, themselves.


With that done, I used basic acrylic artist paints (not craft paints) to finalize the detail and give depth to the terrain. I decided to add an extension to the bottom using the little bit of foamecore left over.

That's it for this part, but more will come into work on the base, as it will have some more work to hold the models themselves.

STAY TUNED!

2012/10/07

Last Shooting WIP 2: MSN-02 Zeong

Okay! Back again with the shorter (photo-wise) WIP for my diorama.

... Probably confused, right?

Well, I wasn't stopping with just the RX-78-2 this time around.

LSP-001 - "Escape" Work in Progress Report
Episode 2: MSN-02 Zeong


That's right! I'm also doing the MSN-02 Zeong (head) to reenact the entire scene from the last episode of Mobile Suit Gundam!

 Back View.

Here, you can see all damaged parts created for this. I hand-crafted the melted surface using an epoxy.
The wire sticking out of the side is used for mounting the head to the Gundam's rifle beam.
I actually drilled out the hole in the Zeong's "mouth" Make it a bit more dynamic.

The explosion from before is made from poly-fiber, which I hand painted to give it the explosion depth. The scrap pieces being blown away are just parts of putty, which have been painted.
The centerpiece is the Zeong's right "ear" with the horn being bent toward the tip. The painting was done to look as if the part is reflecting the explosion.
Note that this is my first time working with suck detail, so I'm not ashamed to say I'm extremely proud of this outcome, thus far!

And here's the Zeong mounted onto the Gundam's beam rifle shot. I had to break out my Tamashii Stage 3 (Mega Man X customized) to balance the Gundam, since it isn't properly balanced to hold the weight of the Zeong's head above itself yet.

Once again, I could NOT be happier with the look of this, thus far. But, a couple things are still missing...

NEXT TIME: ... THOSE THINGS!

2012/09/30

Last Shooting WIP 1: RX-78-2 Gundam

I've posted most of these pics in a bazillion other places, already. Buuuut, this is kinda my main hub for this hobby, so let's get to it!
Once again, this project was started way back in January, but the move and subsequent struggles following sent this to the back-burner for much of the year. But with no other models to work on right now, it's about time I finish this. Starting with...

LSP-001 - "Escape" Work in Progress Report
Episode 1: RX-78-2 Gundam


Front and back views of my modified HGUC 1/144 RX-78-2 Gundam. I used the Animation Color version from the first Gunpla Starter Set that came with the MS-06 Zaku II. The beam was taken from my scrapped RG 1/144 RX-78-2 Gundam.

Here, you can see some of the modding I did to the torso, including some serious retooling of the right shoulder to tilt it higher and stabilize it there. I used two thin runner sprues to serve as pistons in the exposed opening. I also separated the upper torso from the waist on the right side to complete the necessary arching for the arm to go almost straight up.

The neck was filled with putty and scraped at a bit to achieve the head's blown-off look. ^ ^
I painted the neck the same off-white/green (color accurate to the anime), and dry-brushed some black and silver. Then highlighted the highest parts with a combo of red, orange and yellow to make it appear still heated.

The arm was treated similarly to the neck. However, it required me to cut off the peg from the shoulder bock, and puttied the cavity to make it look marred up.
Painting was also similar treatment, but I didn't use the lighter highlights, since the arm was blown off many moments before the head, so the heat would likely have dissipated quite a bit. The shoulder armor simply had a few dings added to it with some "burned" paint treatment, since it is near the wound.

These were all very easy modifications, and I like this cleaner look versus the overly dirty look I originally approached these projects with. This better accentuates the damaged parts and draws your eye to those rather than disguises them within a chaos of messy paint streaks. ^ ^

The compact size of the HGUC makes this much easier on my paints, since I don't have to mix a whole lot as compared to an MG.
And, as I'm sure you're probably going to ask, why didn't I use the RG since I had it.
Well, that reason is 2-fold. 1: The HGUC is more accurate to the original anime in simplicity, making it feel more nostalgic. 2: Because I didn't like the RG. At all.

I'm not going to speak for the whole line, but I felt the RG was too flexable for such a small size. I couldn't pick it up without accidentally altering it's pose in, like, 12 different points. >_<

But, that's all for the RX-78! The next part had a lot more going for it, mod-wise. Despite being smaller in mass...

STAY TUNED!!

2012/09/20

Familiar Territory

Yeah, I haven't been able to do what I set out to do since I've come back to this blog, but that doesn't mean that I've given up, either. The MG Gundam Sandrock turned out to be in vain. Due to far too many slip-ups and a subsequent lack of motivation, I wasn't able to complete it prior to the contest's deadline. So, that model's been scrapped till I can get replacement parts for what was messed up.

As for my reviews, I've fallen even further behind due to an old ailing problem: My camera.
The thing won't stay on for more than long enough to take maybe one photo, if I'm lucky, and refuses to hold a charge. And I have no way to tether it to an USB adapter, since my PC is in a whole other room... I have another back-up camera, but I'm having a hard time figuring out the odds-and-ends of it. If I ever can, I'll use it to finish the 5-or-so reviews I've had writen for, like, 3 months, now.

The final thing, and something I've been meaning to work on since I started it back in January, was a reboot to a project I started way back in 2005...

Mobile Suit Gundam: Last Shooting Project
(Logo design by me)

As it states, it's the "Last Shooting" or dioramas from the final battles from each series. I had done a few of these previously, though in Master Grade from. However, for this reboot, I've decided to take the smaller, more cost-effective route and go with the HG 1/144 brethren. This allows me to also make stages and backdrops I was unable to do in my youth.

It's definitely a work-in-progress, as I hadn't gotten the next part to work on this. However some "things" have come out recently to help with a dilemma I had run into when I first started...

Anyway, I have a teaser pic, taken back in January when I first set forth on this project:

Once I've finally been able to continue this, you'll all be the first to know.
And, as I so often have to do, I apologize for the lack of activity. But I won't let this place die so easily.