2012/10/28

Last Shooting WIP 3: A Baoa Qu base

Okay, the next part of this is not a kit, but the scratch build of the display base for the whole diorama.


I chose to make it roughly 10" x 10" x 10" to conserve space but still provide decent room for detail.
The frame is made up of 3/16" black foam core cut into panels. I used craft glue and painter's tape to stabilize it while the glue dried.


Testing to see if the size will be good. Orginally, I was going to have the back wall continue upward for the actual facility detail to show. But cut that out, as I didn't have the material to extend the back wall, plus the Zeong head coming up over the top will hopefully prove more dynamic.


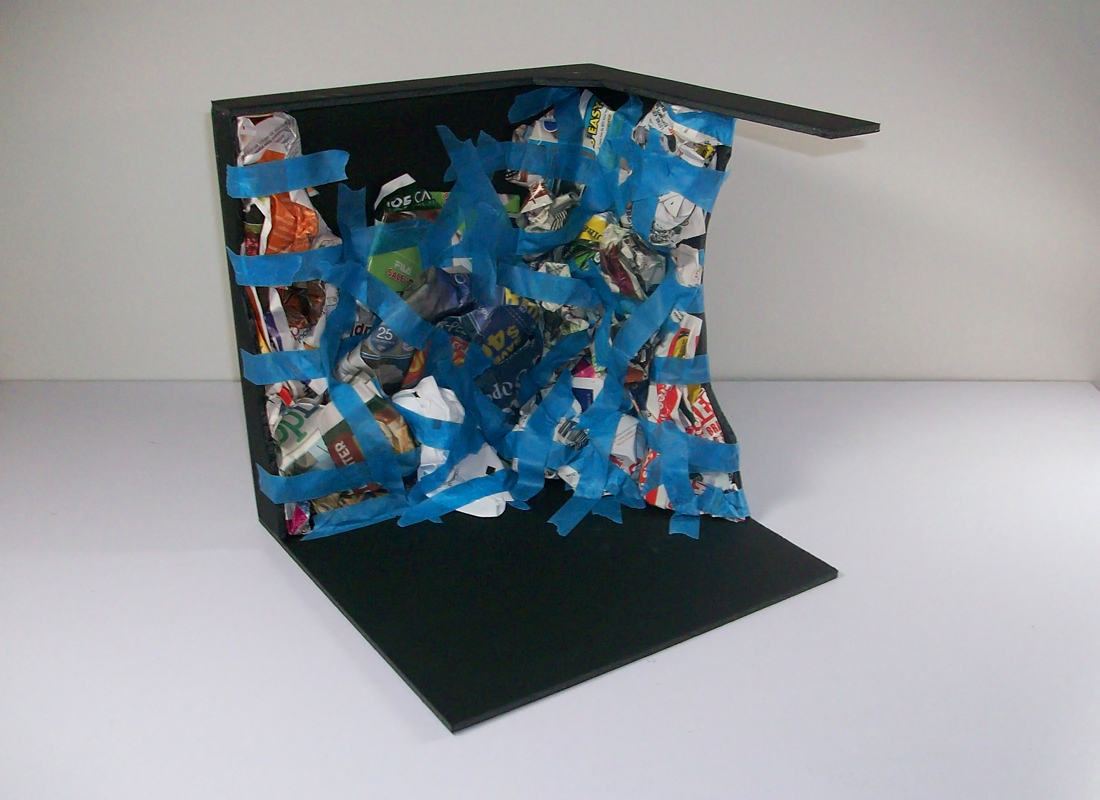
The next step involved crumpling newspapers and ads to start the base for the rocky structure the Gundam will be standing in. This will be covered with plaster cloth to create the rocks, themselves.


With that done, I used basic acrylic artist paints (not craft paints) to finalize the detail and give depth to the terrain. I decided to add an extension to the bottom using the little bit of foamecore left over.

That's it for this part, but more will come into work on the base, as it will have some more work to hold the models themselves.

STAY TUNED!

2012/10/07

Last Shooting WIP 2: MSN-02 Zeong

Okay! Back again with the shorter (photo-wise) WIP for my diorama.

... Probably confused, right?

Well, I wasn't stopping with just the RX-78-2 this time around.

LSP-001 - "Escape" Work in Progress Report
Episode 2: MSN-02 Zeong


That's right! I'm also doing the MSN-02 Zeong (head) to reenact the entire scene from the last episode of Mobile Suit Gundam!

 Back View.

Here, you can see all damaged parts created for this. I hand-crafted the melted surface using an epoxy.
The wire sticking out of the side is used for mounting the head to the Gundam's rifle beam.
I actually drilled out the hole in the Zeong's "mouth" Make it a bit more dynamic.

The explosion from before is made from poly-fiber, which I hand painted to give it the explosion depth. The scrap pieces being blown away are just parts of putty, which have been painted.
The centerpiece is the Zeong's right "ear" with the horn being bent toward the tip. The painting was done to look as if the part is reflecting the explosion.
Note that this is my first time working with suck detail, so I'm not ashamed to say I'm extremely proud of this outcome, thus far!

And here's the Zeong mounted onto the Gundam's beam rifle shot. I had to break out my Tamashii Stage 3 (Mega Man X customized) to balance the Gundam, since it isn't properly balanced to hold the weight of the Zeong's head above itself yet.

Once again, I could NOT be happier with the look of this, thus far. But, a couple things are still missing...

NEXT TIME: ... THOSE THINGS!