Char’s final mobile suit used during the One Year War, the Zeong held the title as being the first MS that Char piloted that wasn’t a unit customized for his use (On-screen, anyway). I never got this one previously, so this was a brand new addition against my old line-up.
I: Main Body
Front View
Back View
Another very low-detailed
HGUC, the Zeong has but minimal panel lines. Looking at it’s size and lack of legs, it’s always a bit tricky to tell its height. With the base, it stands
(ha) with the
HGUC Char’s Zaku II’s blade antenna reaching the Zeong’s shoulder.
Head
The head instantly starts off with more details and parts than your typical HGUC head. Consisting of 13 parts, the head rivals the size and complexity of most HG’s torsos! The sculpt is dead-on to the original Okawara design, save some proportional fixes, courtesy of Hajime Katoki. No movable parts are noted on the head, and the eye is still achieved with a foil sticker that has to be placed.
As with how I did for the
Char’s Zaku, the monoeye was recreated using the sticker, painted over using silver and a clear layer of hot pink. Also, as with the Zaku, I’ve decided to restore the sticker’s original color (post-photography stage) to better contrast against the black field.
The eye’s field was painted flat black, as well were the nozzles of the side thrusters and the mega particle cannon. The inner neck rim was painted gunmetal, purely for color-accuracy to some screenshots.
Torso
The upper body has a very simple look to it, with only the cockpit hatch being the sole panel lining immediately visible, aside from some aesthetic notching on the back. But, it has room for some hidden gimmicks to boost its articulation, and details that come with those.
The neck joint, the collar and the waist all have the ability to arc backwards, allowing for about 25-degrees each of movement. Meaning, at about 75-degrees, the Zeong is capable of looking almost up above its own head. The tapering exposed armor on the joints when arced back is a nice addition, and doesn’t overwhelm the otherwise plain design.
The neck joint, itself, has minimal extra detailing, mostly being allocated to the connector of the head.
The arms are only accommodated by a simple polycap embedded in the torso, but has some swivel allowance, but not as good as most kits around the time.
The four thrusters, divied-up around the four corners of the torso, are molded properly, with the inner vents intact. These thrusters are the only things to receive paint treatment on the upper body, with gunmetal for the inner rim of the thruster and flat black for the hollow.
Arms
The arms are given a lot of attention by the sculpting to allow all the exposed details to be accurately reproduced, while still retaining the simplicity of being a 0079-based unit. The shoulders are a fairly simple 2 part + polycap construction, with the bicep connecting via a peg from the shoulder. The shoulder armor is only two parts, with the main armor being molded solid and a singe double-pegged insert slid into rails to attach the arm to the armor to the torso.
The elbows are more than just the polycap with a small sheath covering popular with the at-the-time HG‘s, but instead a multi-part joint of two parts with a polycap filling a hollow to build the bicep around, typical of most 1/100 arm joints today. A muzzle part attaches to the end peg of the elbow joint to surround the pressure slot for the forearm guide wires to connect securely.
The forearms are subtly detailed, considering having 4 boosters, a decent wrist joint and about a combination of 7-or-so parts. All details are nicely reproduced, with most of said details occurring around the joining areas of other parts. The boosters are painted in the same fashion as the torso thrusters: Gunmetal and flat black.
The hands are of interesting construction, being two parts for the palm/back hand and the five fingers being independently ball-jointed, but fixed at a “relaxed” posture. The ball joint does allow enough lift to allow the muzzles of the fingers to align so the tips are straight out from the hand. The hands are, otherwise, standard connection via ball-joint to the forearm, with no extra joint for wrist flexibility.
Waist
The waist contains almost all of the added details, but are nicely distributed along the shell of the skirt.
The two mega particle cannons on the band are faithfully reproduced, with the barrels being parts inserted into the blast shield openings, which retain the lining details. Those require the purple to be painted, however.
The skirt has a few added details, including a few panel lines, gaps and vents not present on the original lineart, but are welcomed on what would be a very blank large surface. The vents were panel lined with a
Micron .005 and the side panel gaps were painted flat black to give it some false depth.
The underside contains most of the work on this kit, with multiple conductive pipes and other heretofore unseen details foreign of the old 70’s lineart. Once again, though, given the large size of this area, being left blank would have been rather dull. I painted the pipes silver, but did not add any gold accents, as I had no gold marker at the time…
The 7 rocket thrusters that are contained within are well detailed and individually jointed, giving absolute freedom of directional movement. All the nozzles of the thrusters were given flat black for the hollows, with the 5 small thrusters given gunmetal to the inner rims.
I’ll also note the detail along the bottom of the skirt, the “dotted-line” pattern that’s to provide a layered look to the armor. For some reason, I didn’t paint these. Something I might have to go back and fix in the future. Along with the gold for the pipe accents…
Legs
HA! Ha, ha! Oh, that's a good one! Ho! Hoo, lemme... lemme just settle down for a sec...
Oh, man, that... That was
classic.
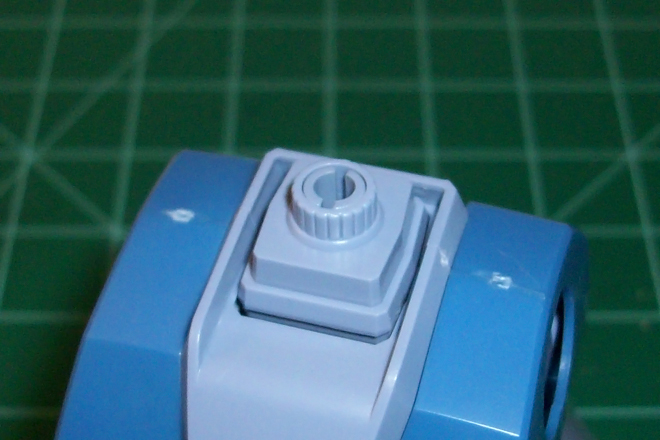
II: Display Base
Front View
Back View
The given display base is a very simple design, yet compliments the Zeong very well. I think being the final Zeonic MS designed to compete with the Federation’s Gundam (A popular theory to the “G” in “
ZeonG”), an upside-down V-fin look is suiting for such a role.
The base’s construction is very simple, yet tight. Having only 4 parts, it’s surprisingly sturdy and holds the weight of the Zeong well, even when angled.
I painted the base of mine gunmetal, both to differentiate it from the intermediate blue of the Zeong and to further affirm it’s Anti-Gundam symbolism.
The base attaches to the Zeong via the peg into a polycaped slot in the Zeong’s fuselage.
III: Accessories
The only accessories provided (or necessary) are the wire cables for the forearm cannons. They’re made of the standard rubber-coated wire that’s actually nice and thick, which holds the forearms’ weight well. The connectors themselves are simple one-piece parts that the wires just slide into. I cemented the wires into mine to avoid any sudden slips. Unfortunately, due to being round pegs, the weight of the arms can still simply rotate the wires.
IV: Poses
Of course, being a legless, incomplete unit greatly limits the dynamic posing of the Zeong. But that’s more of an intentional design flaw that can’t really be blamed on the designers of this kit.
Arms launched. Preparing for All-Range Attack.
I can see the enemy!
Quick escape!
V: Verdict
Given a lot of the natural design quirks, this kit worked with all of them very well, bringing out a lot of potential from a mobile suit that was physically only 70% complete. I honestly can’t think of any way to improve on what was accomplished without being overly finicky, the guide wires notwithstanding. All-in-all, a great rendition of a timeless “final boss” MS.
FINAL RATING: 4.75 OUT OF 5


No comments:
Post a Comment