

*For the record, I hate Kou Uraki, and felt he had no right using such a marvelous piece of machinery.
 Anyway, it's not until 2010 that I'd be able to realize this dream. Thanks to a three-check month and Christmas funds from family, I was able to obtain this behemoth!
 Its box is easily the biggest I’ve seen (Though the PG Strike Freedom’s is a close second!), and I’ve decided after I move, It shall be used for mass-storage!
 Inside the box is 2 more boxes!


Both have lineart of the components originally packaged in their respective box.
 They also join to make an image. Here’s the one most commonly seen online, with the runner listings for each box...
(Online, it's usually seen with a pack of cigarettes next to it. Either for scale or because the build required some people to start. O_O')
 And the one less seen. The concept design by Hajime Katoki.
 This is one of the biggest projects I've undertaken, and the whole assembly took me just short of a week! (For me, that's long.) I built this a bit before the plan to start a Gunpla blog, so I have no photos of the actual assembly. However, I will go into detail with the individual components that make the Dendrobium, starting with...
RX-78GP03 Gundam GP03 Dendrobium Orchis
I: Display Stand
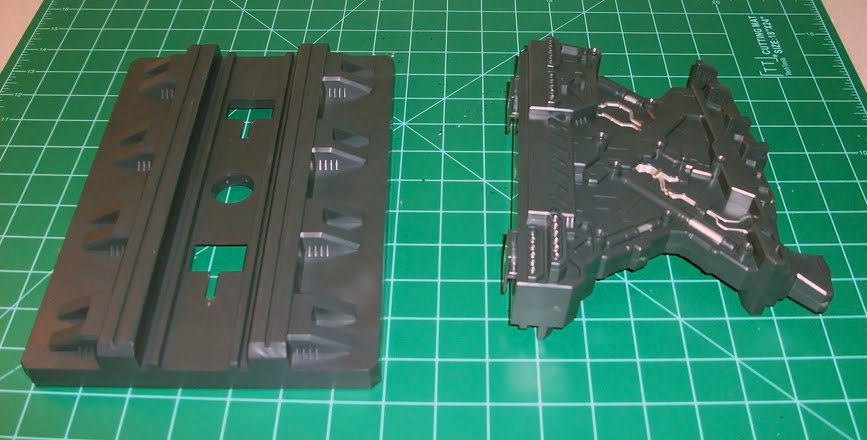 The stand is a simple 3-piece process. What is unusual, however, is the sheer density of these parts. Each one individually weighs about the same as a fully built HGUC! Put together, you're holding the weight of 2 NG 1/100 models, at least!
 To assemble, the stand just slides onto the base and locks pretty decently. It's never slid off involuntarily, but doesn't require excessive force to remove, either.
 Big, right? the whole stand is roughly 7" X 10" X 7.5".
II: Orchis Base

Several strange steps and difficult assembly issues plague this part, mostly due to precise alignment. There are two metal plates inside of the base (thus, the weight) and numerous screws that hold this thing so tightly together, the words "test fit" will be meaningless. Once this thing's together, it's to stay.
 The dock has a lot of little details, as well as a lot that needs to be painted to look good. Most of this was done in flat black while the small vents on the angled portion were painted in aircraft gray to match the mechanical parts of the Orchis. More to the docks functionality will be discussed in the final part.
 Some surface detailing on the top.
 And more on the fuselage, including more to be painted gray.
 The thruster vane has always been on of my favorite parts about the Dendrobium's design, largely due to the large effect fins and staggered thrusters. A lot more little details here. The little pipes and such, which I would normally leave alone on an HGUC, demanded silver/gold treatment to aid in its overzealous design. The thrusters, themselves, had been completely coated, using red on the inner rims, gunmetal (Testors) for the nozzle, flat black for the hole of the nozzle, and gunship gray for the exteriors (As even in the original lineart, they're different in tone than the main mechanical color).
III: Large Claw Arms
The claw arms are, by far, the most intricate part of this beast in terms of assembly. Any similarity to an MG's mechanics are isolated to this point.
 Thanks to a multi-hinged joint feature, the claw arm can go from this retracted position...
 To extending way out in front of itself!
 They also feature a pivot at the base of the arm that allows them to swing in almost 360-degrees (provided parts of the Orchis itself or the stand don't get in the way.)
 The large beam saber hilts store inside the "mouth" of the claw. The ends have little notches protruding out of them, so getting them out is not a problem at all.
 On the hilts, there are two hardpoints that allow the claws to grip them steadily, as pictured above.
 The beams supplied are borrowed from most Perfect Grades, so they're quite large. However (i'm being nit-picky here), I feel the beams are still too small, as in the OVA, I'm quite certain the things were used to lop off cruisers such as random near-by Musais and the like.
IV: Weapons Containers
 The containers are probably as massive as the stand, and slightly heavier, as well.
 Loads of detailing on the backside. More aircraft gray for the divide between the inner and outer containers (not separable nor constructed as such).
 Containers with hatches open. To open them, you must first raise the latch that lies at the top between the two halves. This, otherwise, locks the inner panel from raising. In either container, there are four usable slots for storage: The two hollows which store the missile pods, and the hatches 2 away from either of the hollows that store a specific weapon for the Stamen. These will be covered during part 3.
Physically, there's no difference between the two containers aside from one being mirrored from the other. So, only where they differ will I bother with photography.
To assemble these to the Orchis, two more parts are required.
 The part in the center will maintain the otherwise off-balance weight of the containers. This part is built even thicker than the display stand's parts. If I threw it, it would probably do some damage to a moving vehicle...
 That part simply slides into place on the base...
 Then slide the containers into position. Now comes the tricky part. See that piece that's resting on the right-hand container? That is the key that locks it all together.
Holding both containers as tightly together while attaching this piece can be a headache for non-mutants as (I assume) you or me.
 And all locked! Now rivaling an original XBOX in weight, the Dendrobium's mass grows.
V: I-Field Generator
While building this, I kept getting it confused with my near-by drink, causing some awkward moments I shan't discuss further...
Also, I forgot to take a picture of it by itself...
...
F**k.
the plate for the front of the generator is reversible to make part-swapping possible without the need for another part!
 The closed side.
 And the open side.
Both sides were completely painted, again, in gunship gray to differentiate it apart from the main mechanical gray. the details were made with chrome silver and Gundam marker gold. This is also the only part I panel-lined in black (closed side).
If you notice in the aperture of the face plate, there's a small notch. That is to be alligned with this piece:
 This is the bar that holds the plate to the main generator. Since the plate was completely painted, I had to file the hole a bit to allow it to fit without getting stuck. But there was a second issue...
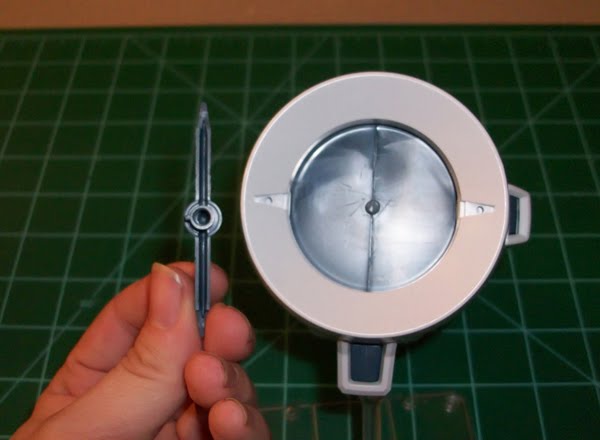 The bar contained a peg at either end as well as a slot for the broad peg on the main generator. When attached, it was VERY difficult to remove. I remedied this by lopping off the two pegs and filing both the center slot and it corresponding peg. The difference is now it can be easily removed for swapping the plate sides without potentially breaking the bar, but still stays in place when moved around.
 Closed face attached.
 Open face attached.
 The whole generator attaches to the left-hand side of the Orchis via four slide-latches which hold it very securely. It can honestly be difficult to remove once in place, but the right amount of force backward will loosen it.
 The I-Field generator connected, ready to be torn off by Neue Ziel's non-beam claw arms!
VI: Large Mega Beam Cannon
The large mega beam cannon is probably the selling gimmick of the Dendrobium. It's a beam cannon that is at least 3 times larger than any mounted on a battleship. One fire from this baby didn't even graze a Musai and its cannons melt and apparently overheat the bridge?????
Once again, too TOO powerful for someone as incompetent as Kou to wield.
 The main base of the cannon. I'd suppose you could call this the generator? This is another hunk of large parts with only a few small gimmicks and a bit of weight.
 The handle gimmick is probably the most significant of the gun's small gimmicks. It actually slides open almost right in front of the Stamen.
 The grip was painted to reflect the close-up shots from the OVA.
Thanks goes to Ngee Khiong for pointing this detail out!
The other small gimmick is the sight at the top of the cannon. It can pop up and retract. Nothing too impressive. I'd say it's just so it's out of the way when you open the containers (Which it can hinder). The sight itself had to painted. I did my standard silver+clear coat green to make it more scope-y...
 As with the I-Field generator, the cannon just slides onto the right-hand side of the Orchis. This one sticks a LOT more than the I-Field once on, however. I'm amazed I got it off without sending it across the room!
 I know it's difficult to see, but the back end of the barrel (sorry, no separate photos) has a key-lock design to attach to the cannon base.
I tried multiple photos for different angles, but this is the only one that didn't blur... An there we go, barrel attached.
... What?
VII: Orchis Completed As you can see, the completed Dendrobium Orchis is beyond belief in size.
For those who aren't familiar with metrics, the measurements of this when completed are
H:13 3/4", W: 17 1/4" and L: A whoppin' 39"! That's 3 inches over 3 feet!!
As you can see, this baby is very much Bandai's behemoth. The fact that it's still in production honestly frightens me. But if it weren't I'd die at considering how much this would have cost with an "OOP" label on most sites.
Part 2 will be covering the RX-78GP03S Gundam GP03S Dendrobium Stamen.
Stay tuned... or however you keep track of these...
5 comments:
AMAZING! I eagerly await the next part! and next time I have a "3 check month" (I truly love those!), I may have to finally pick this up!
@Joe
It is difficult to part with that much money, but it is very much worth it in the end. I do suggest picking up (If you don't already have) some metal modeling files. One with a rounded tip is CRUCIAL to finishing the weapons containers...
But that'll be covered in part 3.
this item is stunning,, love to wait the part 2 :D
Whooaaa, now this is rare, the GP03D review hehehe. And phew, the size is massive, I wonder where to put this behemoth.....
I wish that you have more pics for the action poses though, covered in part 4 maybe?. :D
@canopy
It's only 3 parts. And don't worry, there will be some action poses and the like.
Post a Comment